Getting Started
This guide will walk you through downloading, installing, and running Block-Suite for the first time.
System Requirements
| Requirement | Details |
|---|---|
| Operating System | Windows 10/11 (64-bit) |
| Java | Java 17+ (Java 21 recommended). Download from Adoptium |
| Internet | Required for downloading dependencies, updates, and playit.gg tunneling |
| RAM | Minimum 2 GB free (Velocity proxy uses ~512 MB–1 GB) |
| Ports | 25565 (proxy), 35565 (interception) — configurable |
Download
Go to GitHub Releases
Visit github.com/itsreyi/BlockSuite/releases and download the latest .zip file from the Assets section.
Extract the ZIP
Right-click the downloaded ZIP file → Extract All → choose a folder (e.g., C:\BlockSuite). You'll see a folder containing the application files.
Run Block-Suite
Double-click Block-Suite.exe to launch the application. On first run it will check for updates automatically.
If you prefer running the JAR directly instead of the EXE, open a terminal and run:
java -jar blocksuite-app-1.0.0.jarMake sure you're in the folder containing the JAR file.
First Launch
When Block-Suite starts, several things happen automatically:
1. Internet Connectivity Check
The app pings api.github.com, google.com, and 1.1.1.1 to verify internet access. If you're offline, a "No Internet Connection" overlay appears with a Retry button.
Internet is required for downloading the Velocity proxy, playit.gg agent, player skins, and geolocation data.
2. Update Check
Block-Suite queries GitHub Releases for the latest version. If an update is available, a mandatory update overlay appears — you must update before using the app. This ensures everyone runs the latest, most stable version.
The update downloads automatically, applies via a background script, and restarts the application.
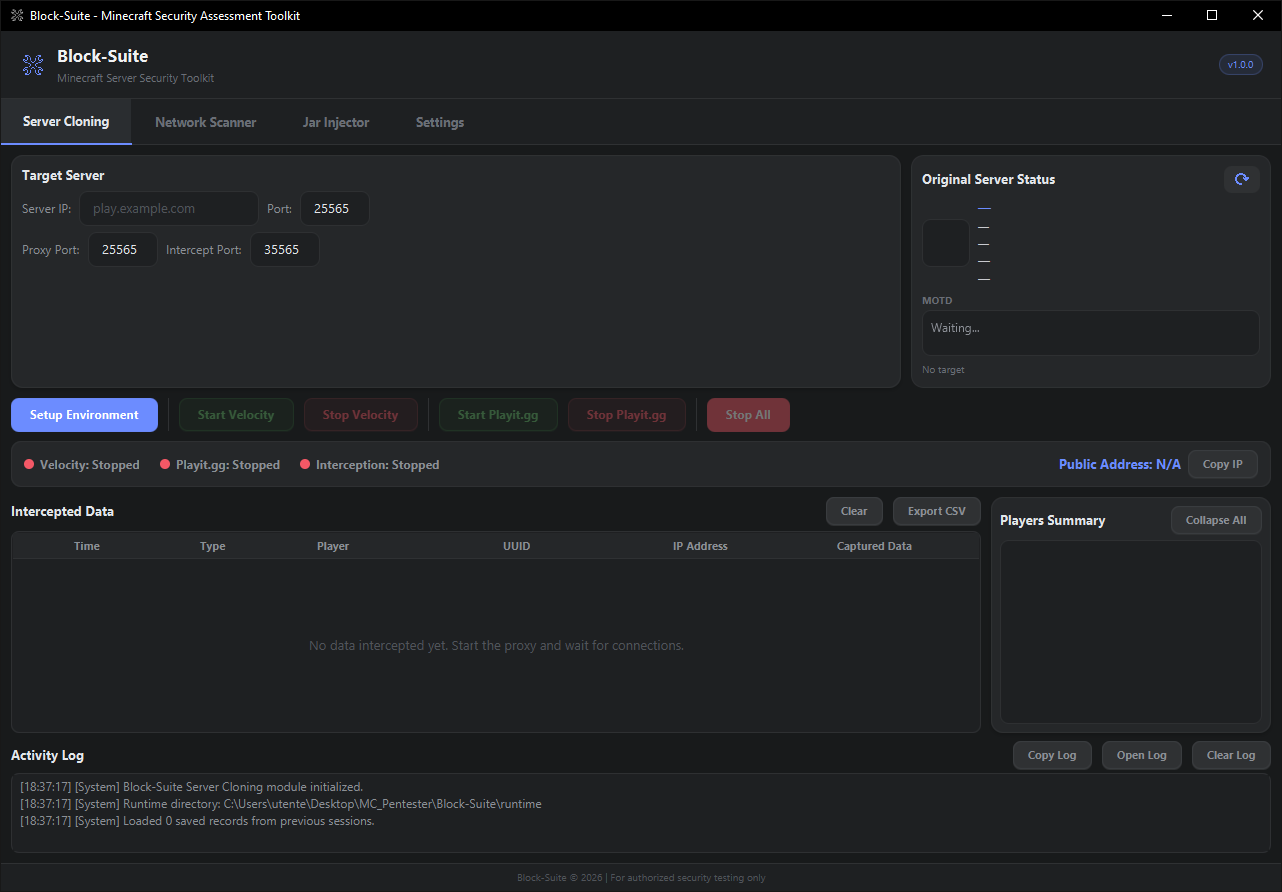
3. Main Window
Once checks pass, the main window appears with 4 tabs:
| Tab | Status | Description |
|---|---|---|
| Server Cloning | Active | The main MITM proxy workflow — configure, start, intercept |
| Network Scanner | Coming Soon | Scan for Minecraft servers on a network |
| Jar Injector | Coming Soon | Jar injection tools for server security testing |
| Settings | Active | Server appearance, proxy options, themes |
Quick Start Example
Here's a practical, step-by-step example of cloning a Minecraft server:
Block-Suite is designed for authorized security testing only. Only test servers you own or have explicit written permission to test. Unauthorized access to computer systems is illegal.
Scenario: Testing your own server at play.myserver.com:25565
Enter Target Server
In the Server Cloning tab, fill in:
- Server IP:
play.myserver.com - Port:
25565 - Proxy Port:
25565(leave default) - Intercept Port:
35565(leave default)
Setup Environment
Click Setup Environment. Block-Suite will:
- Download the Velocity proxy (first time only)
- Generate proxy configuration for your target
- Install the interception plugin
- Download the playit.gg agent (first time only)
- Auto-ping the target server to display its status
Wait for the log to show "Environment setup complete!"
Start the Proxy
Click Start Velocity. The status indicators will turn green:
- 🟢 Velocity: Running
- 🟢 Interception: Active
Create Public Tunnel
Click Start Playit.gg. After a few seconds, a public address appears in the status bar (e.g. example.at.playit.gg). Click Copy IP to copy it.
Haven't set up Playit.gg yet?
If this is your first time, you need to claim the agent, create a tunnel in the playit.gg dashboard, and configure the Local IP, Local Port, and Proxy Protocol. Without this step, the tunnel won't work.
👉 Follow the complete Playit.gg Setup guide →
Once done, come back here and continue with step 6.
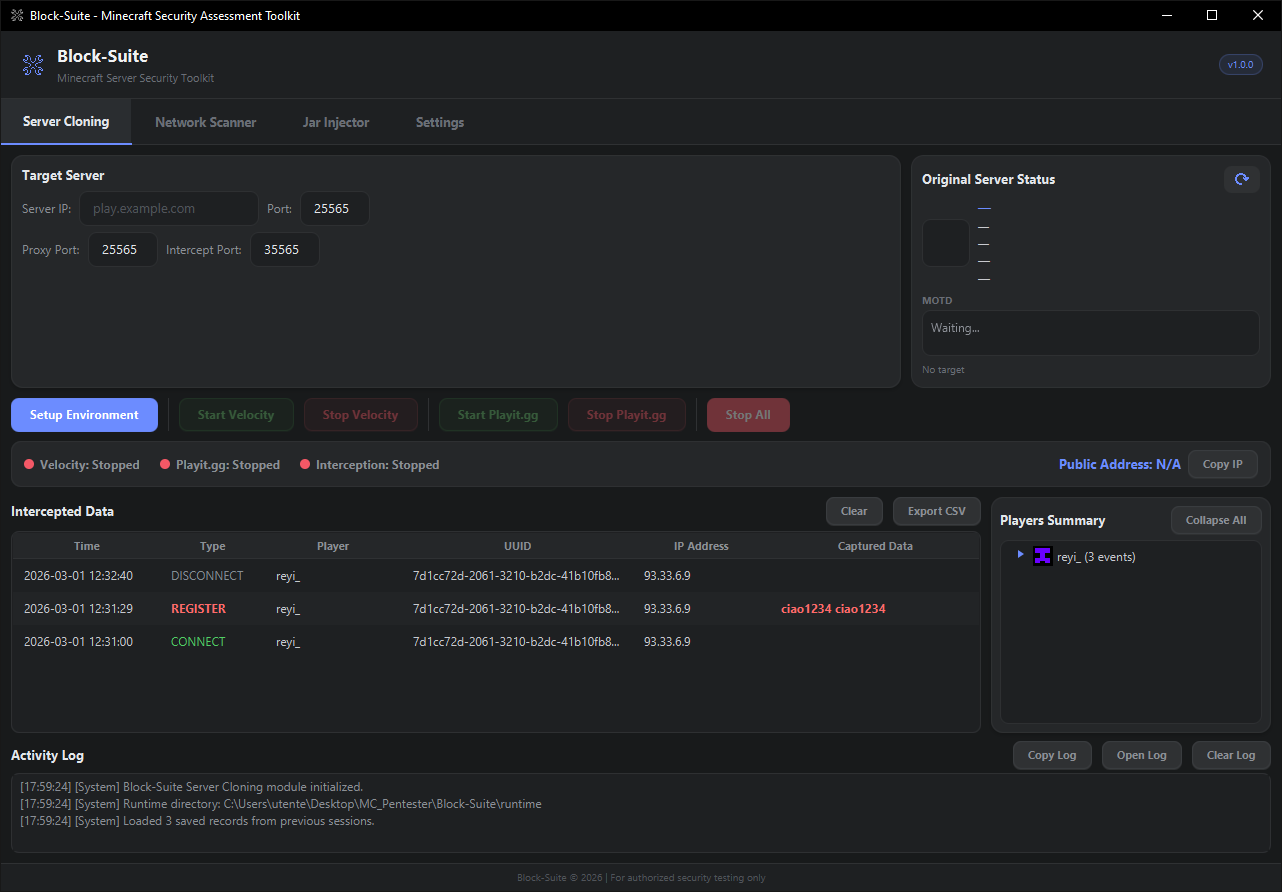
Connect & Intercept
Open Minecraft and connect to the public address. You'll be transparently proxied to the target server.
Try /login test123. Watch the interception table light up with the captured credential in real-time.
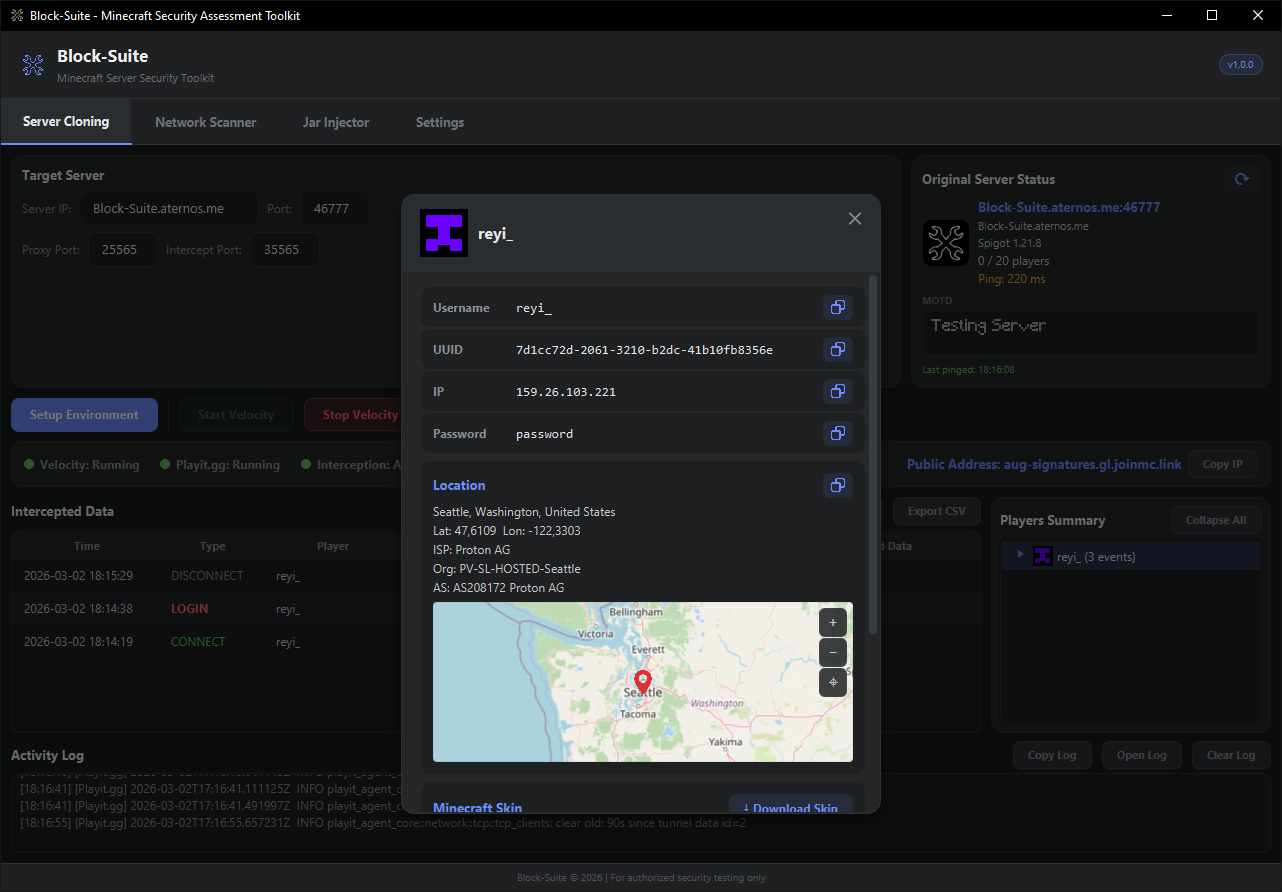
Analyze Data
Right-click a player in the Players Summary panel → More Info to see their full profile: geolocation, interactive map, Minecraft skin, credentials, and export options.
Runtime Folder Structure
Block-Suite creates a runtime/ folder next to the application. Here's what it contains:
runtime/
├── settings.json           # Your saved settings (themes, proxy options)
├── player_data.json        # All intercepted data (persisted across sessions)
├── export_*.csv            # Exported data files
├── heads/                  # Cached player head images
├── velocity/
│   ├── velocity.jar        # Downloaded Velocity proxy
│   ├── velocity.toml       # Generated proxy config
│   ├── forwarding.secret   # Forwarding secret key
│   ├── blocksuite-ping.json # Server appearance overrides
│   └── plugins/
│       ├── blocksuite-plugin.jar  # Interception plugin
│       ├── viaversion-*.jar       # (if ViaVersion enabled)
│       └── viabackwards-*.jar     # (if ViaVersion enabled)
└── playit/
    ├── playit.exe          # Downloaded playit.gg agent
    ├── playit.toml         # Playit configuration
└── tunnel_address.txt # Saved public tunnel addressIf something goes wrong, you can safely delete the entire runtime/ folder and re-run Setup. Block-Suite will re-download everything fresh. Your intercepted data will be lost, so export first if needed.